
What Is an eSIM for Travel and How Does It Work? A Complete Guide

What Is an eSIM for Travel and How Does It Work? A Complete Guide
The familiar ritual of fumbling with a tiny SIM card tray and a paperclip at an airport kiosk is quickly becoming a relic of the past. For decades, this was the traveler's rite of passage to affordable mobile data abroad. But a new, invisible technology is fundamentally changing how we connect on the go. Welcome to the world of the eSIM, a digital revolution that promises seamless, instant connectivity anywhere in the world, right from your phone's settings. An eSIM for travel is a game-changer.
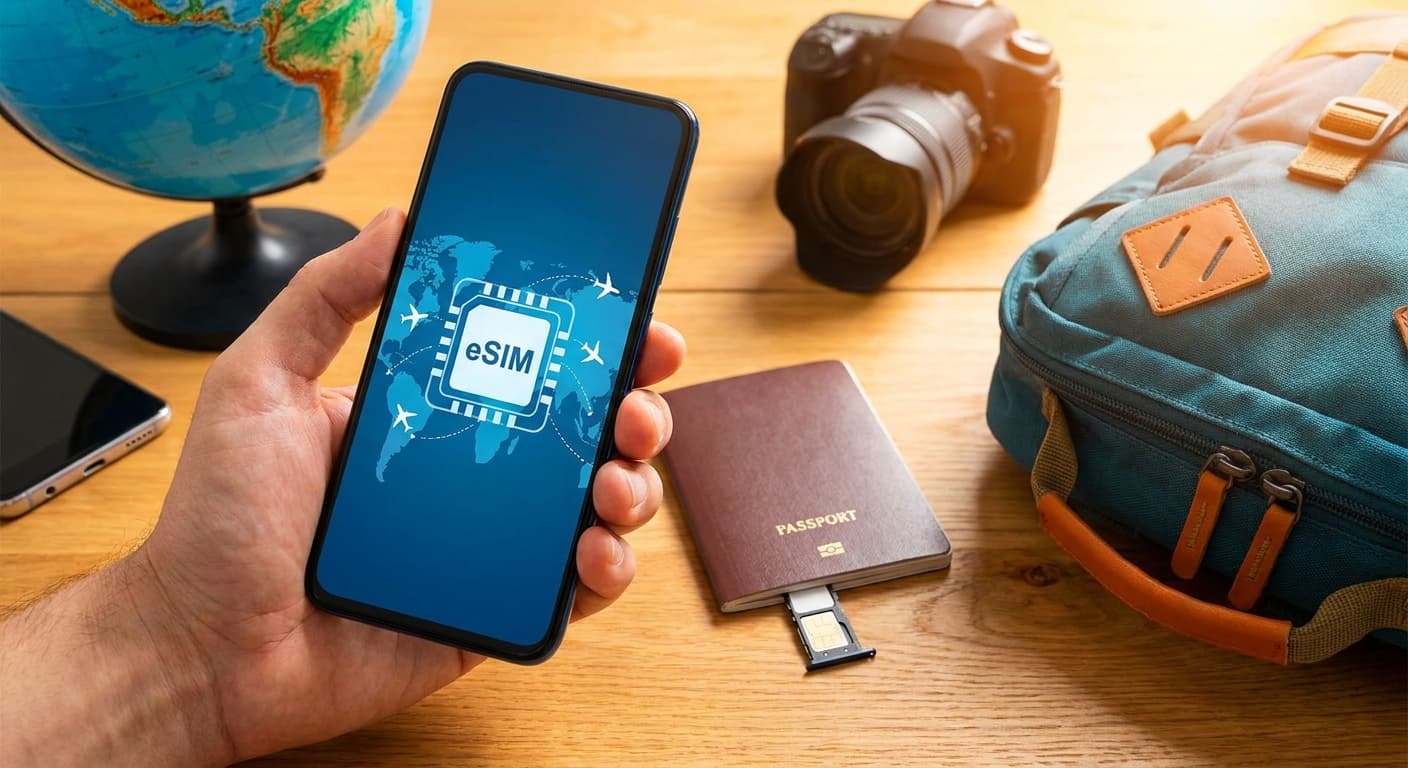
An eSIM, or Embedded Subscriber Identity Module, is a small, rewritable chip built directly into your smartphone, tablet, or smartwatch. Unlike a physical SIM card that you must physically insert and swap, an eSIM can be programmed remotely with a new mobile plan. For travelers, this means you can buy and activate a data plan for your destination country before you even leave home, stepping off the plane with instant internet access and avoiding exorbitant roaming fees.
This comprehensive guide will demystify the technology behind the travel eSIM. We will explore exactly what it is, how it works, and why it represents a monumental leap forward for globetrotters. You will learn how to check if your device is compatible, the key benefits and potential drawbacks, and a step-by-step process for choosing, purchasing, and activating your first travel eSIM. By the end, you'll be equipped with the knowledge to ditch the plastic and embrace the future of travel connectivity.
What Exactly Is an eSIM and How Is It Different from a Physical SIM?
An eSIM is a digital SIM card that allows you to activate a cellular plan from a carrier without having to use a physical nano-SIM. The 'e' in eSIM stands for 'embedded', signifying that the hardware - a tiny chip called an embedded Universal Integrated Circuit Card (eUICC) - is permanently soldered onto your device's motherboard. This chip is rewritable, meaning it can hold multiple carrier profiles at once, which you can switch between digitally.
Think of it like the evolution of music. A physical SIM card is like a CD or a vinyl record; it's a physical object that contains specific information (your mobile plan) and must be physically inserted into a device to work. If you want to change your plan or carrier, you need to swap the physical object. An eSIM, on the other hand, is like a music streaming service. The player (the embedded chip) is already in your device, and you simply download the songs (the mobile plans or 'profiles') you want to use directly to it. You can store multiple albums (profiles) and switch between them with a tap in your settings.
The fundamental difference lies in the delivery and management of your cellular identity. A physical SIM is provisioned and delivered physically; its data is fixed. An eSIM is provisioned and delivered digitally over the air. This digital nature is what makes it so incredibly flexible. You no longer need to visit a store, wait for a SIM card to be mailed, or hunt for a vendor upon arriving in a new country. The entire process of acquiring and activating a mobile plan can be done in minutes from anywhere with an internet connection.
This also changes the physical design of devices. By eliminating the need for a removable SIM tray, manufacturers can create more robust, water-resistant devices with fewer openings for dust and moisture to enter. While many current phones retain the physical SIM tray for a transitional period - offering valuable dual-SIM functionality - the ultimate goal for manufacturers is to remove it entirely, streamlining design and improving durability. The eSIM isn't just a digital version of a SIM card; it's a complete rethinking of how we connect our devices to cellular networks, prioritizing flexibility, immediacy, and a more integrated user experience.
How Does an eSIM for Travel Actually Work?
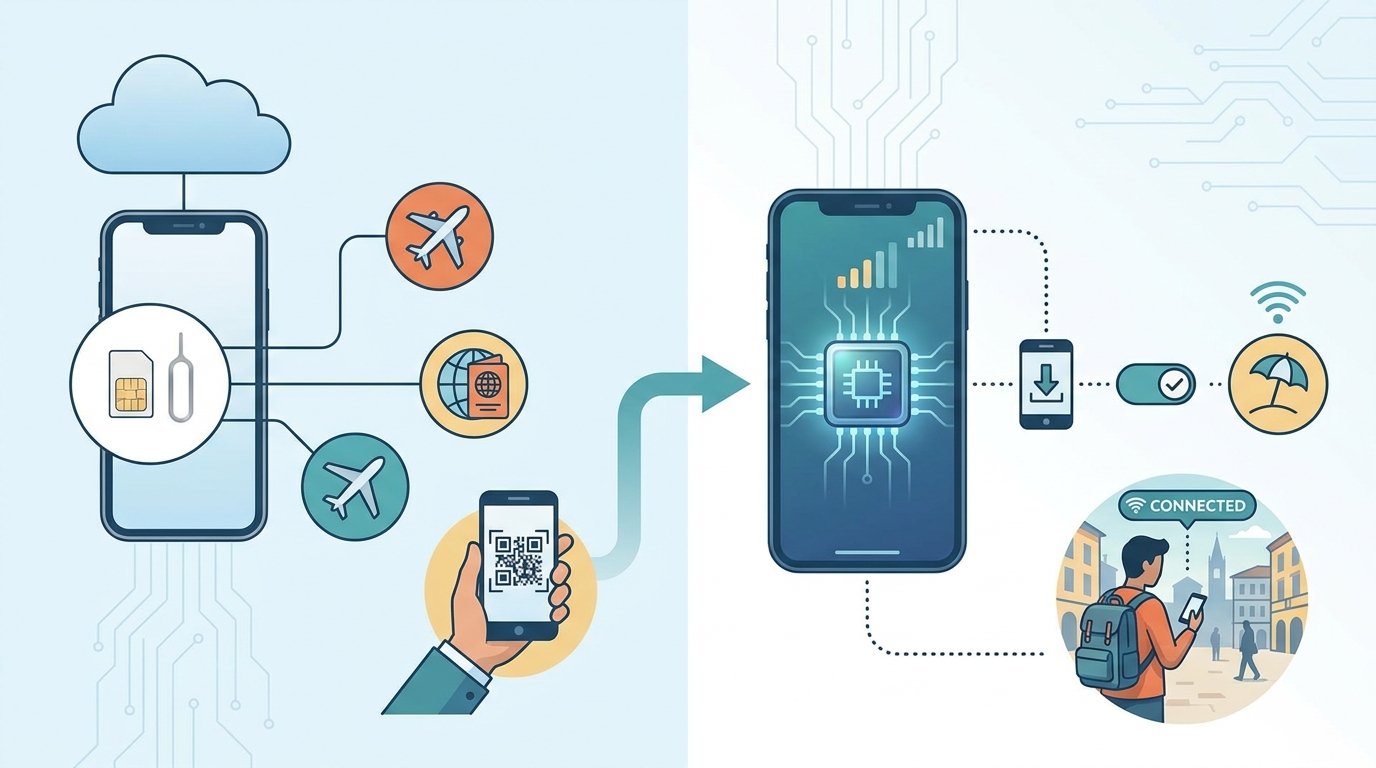
The process of using a travel eSIM works by downloading a digital 'profile' from a provider onto the embedded chip in your phone. This profile contains all the necessary information - network authentication keys, plan details, etc. - for your device to connect to a specific mobile network in your destination country. The entire process is managed through software, making it fast and convenient.
Let's break down the journey from purchase to connection. First, you choose an eSIM provider online or through an app. These providers, such as Airalo, Holafly, or Nomad, have agreements with local mobile network operators (MNOs) all over the world. When you purchase a plan - say, 10 GB of data for 30 days in Japan - you are essentially buying the right to use the network of a local Japanese carrier like Docomo or SoftBank. The provider acts as an intermediary or a Mobile Virtual Network Operator (MVNO).
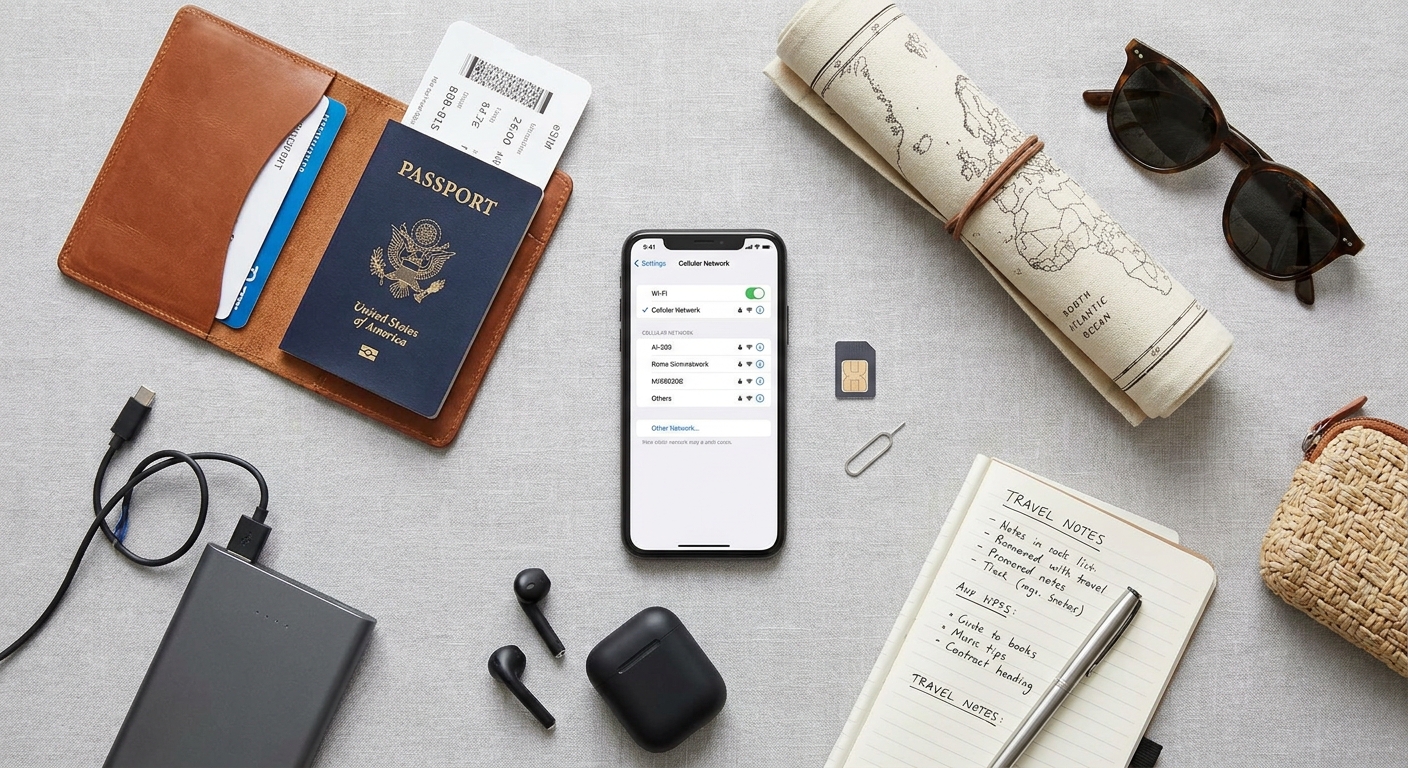
After your purchase, the provider sends you a QR code or provides an in-app installation button. This is the key to the whole process. When you scan this QR code with your phone's camera or tap the button, your phone securely connects to the provider's activation server. It then downloads the carrier profile and installs it onto your phone's embedded eSIM chip. Your phone now holds the digital equivalent of a local Japanese SIM card. You can typically do this at home before your trip, so the plan is ready to go.
Upon arriving in Japan, you simply go into your phone's cellular settings, turn on the newly installed eSIM line, and enable data roaming for it. Your phone will then automatically search for and connect to the partner network (e.g., Docomo). Your data traffic is routed through that local network, meaning you get local-like speeds and avoid your home carrier's expensive international roaming charges. Your primary SIM card can remain active for calls and texts from home (with roaming turned off for data), giving you the best of both worlds. The magic is in the seamless, over-the-air delivery of a local mobile plan without any physical interaction.
Which Phones and Devices Are Compatible with eSIM Technology?
eSIM compatibility is now standard on most flagship smartphones, but it's crucial to confirm your specific model supports it before purchasing a travel plan. Generally, newer premium devices are equipped with an embedded eSIM chip, while many budget or older models may still rely exclusively on physical SIM cards. The device must also be 'carrier-unlocked' to accept an eSIM from a different provider.
To start, let's look at the major manufacturers. Apple has been a major proponent of eSIMs, including support since the iPhone XS, XS Max, and XR in 2018. All subsequent models, including the iPhone 11, 12, 13, 14, 15 series, and the iPhone SE (2nd generation and later), are eSIM compatible. In fact, iPhone 14 and 15 models sold in the United States have removed the physical SIM tray entirely, relying solely on eSIM technology. For Android users, Google's Pixel phones have supported eSIMs since the Pixel 2, with all models from the Pixel 3a onwards offering robust support. Samsung has also integrated eSIMs into its flagship Galaxy S series starting with the S20, and its foldable devices like the Galaxy Z Fold and Z Flip series are also compatible.
Beyond these main players, many other manufacturers include eSIM support in their higher-end devices. This includes models from Motorola (like the Razr), Huawei (P40 and later), and others. The technology is also not limited to phones. Cellular-enabled iPads, the Apple Watch Series 3 and later, and some Windows laptops and tablets (like the Microsoft Surface Pro X) also feature eSIMs, allowing you to get data on the go without relying on Wi-Fi or phone tethering.
How can you be certain about your specific device? The easiest way is to check your phone's settings. On an iPhone, go to Settings > Cellular. If you see an option like "Add eSIM" or "Add Cellular Plan," your phone is compatible. On an Android phone, the path is usually Settings > Network & Internet > SIMs (or a similar path). Look for an option to add a network via QR code. Alternatively, you can dial the code *#06# on your phone's keypad. If an "EID" (eSIM ID) number appears on the screen along with your IMEI, your device has an eSIM. Finally, remember the 'unlocked' rule: if your phone is locked to a specific carrier (e.g., you're still paying it off on a contract), it may not accept an eSIM from another company. Always confirm with your home carrier that your device is unlocked for international use before you travel.
What Are the Main Benefits of Using an eSIM for International Travel?
The primary benefit of using an eSIM for international travel is the unparalleled combination of convenience and cost-effectiveness. It eliminates the logistical hassles of physical SIM cards while providing access to affordable, local data rates, fundamentally improving the travel experience. This convenience manifests in several ways, starting from the moment you purchase a plan.
First is the immediacy of access. You can research, purchase, and install a data plan for your destination from your living room days before you depart. This means you are connected the second your plane lands. There's no need to waste precious vacation time searching for a mobile shop in an unfamiliar airport, navigating language barriers, or dealing with passport registration requirements that some countries impose for physical SIMs. This immediate connectivity is not just a luxury; it's a practical tool for booking a ride-share, checking a map to your hotel, or letting family know you've arrived safely. The convenience of an eSIM for travel cannot be overstated.
Second, eSIMs offer incredible flexibility through dual-SIM functionality. Most modern eSIM-compatible phones also have a physical SIM slot, allowing you to use both simultaneously. This is a game-changer for travelers. You can use the travel eSIM for all your data needs at cheap, local rates, while keeping your primary phone number active on your physical SIM for receiving important calls or text messages (like two-factor authentication codes). You have precise control in your phone's settings to designate which line is used for data and which is the default for voice calls, preventing accidental roaming charges on your home plan.
Third is the significant cost savings compared to traditional roaming. Roaming plans from home carriers are notoriously expensive, often charging a flat daily fee ($10-$15 per day) regardless of usage. A two-week trip could easily add over $140 to your phone bill. In contrast, a travel eSIM provider might offer 10GB of data for that same destination for just $20-$30, valid for 30 days. For anyone traveling for more than a couple of days, the savings are substantial. This allows you to use your phone freely for navigation, streaming, and social media without the constant fear of a shocking bill when you return home.
Finally, there are added benefits of security and environmental friendliness. A digital eSIM cannot be lost, stolen, or damaged like a tiny piece of plastic. Your cellular identity is securely stored on the embedded chip. Furthermore, by eliminating the production, packaging, and shipping of millions of plastic SIM cards and their associated packaging, eSIMs contribute to reducing electronic waste. Alongside other essential travel apps, an eSIM is a more sustainable choice for the modern, conscious traveler.

Are There Any Downsides or Limitations to Using a Travel eSIM?
While eSIM technology offers significant advantages, it is not without its limitations and potential downsides that travelers should be aware of. The most significant hurdle is device compatibility. Although becoming more common, eSIM support is still largely confined to newer, higher-end smartphone models. If you have an older phone, a budget Android device, or a model from a smaller manufacturer, it may not have the necessary embedded chip, making this technology inaccessible to you.
Another challenge is the process of transferring an eSIM between devices. With a physical SIM, moving your service to a new or temporary phone is as simple as popping the card out and placing it in the other device. Transferring an eSIM is a more involved, software-based process. While platforms like iOS are making this easier between iPhones, moving an eSIM from an iPhone to an Android device, or vice-versa, can be complex or impossible, often requiring you to contact the provider to de-register the old device and get a new QR code for the new one. This lack of simple physical transferability can be a drawback if your phone is lost, stolen, or broken mid-trip.
The activation process itself, while convenient, is entirely dependent on having an internet connection. You need Wi-Fi (or another cellular connection) to download and install the eSIM profile by scanning the QR code. This is usually fine if you set it up at home before you leave. However, if you wait until you arrive and don't have access to free airport Wi-Fi, you're in a difficult position - you need internet to get your internet. This contrasts with a physical SIM, which you can simply buy and install without any prior connectivity.
Furthermore, not all travel eSIM plans are created equal. Many data-only eSIMs do not come with a local phone number. This means you can't make or receive traditional cellular calls or SMS texts. While this is often fine for data-centric users who rely on apps like WhatsApp, FaceTime, or Skype, it can be an issue if you need to call a local restaurant for a reservation or receive a call from a tour operator. Some providers are starting to offer eSIMs with included numbers, but they are less common and may cost more. Lastly, customer support can be a mixed bag. If you run into an issue, your support channel is typically an online chat or email with the eSIM provider, which might not be as immediate as walking up to a physical kiosk for a local carrier.
How Do You Choose the Best eSIM Provider for Your Trip?
Choosing the best eSIM provider requires a bit of research and depends heavily on your specific travel plans, data needs, and budget. With a rapidly growing market, providers range from global aggregators to region-specific specialists. The best eSIM for travel is the one that offers a reliable connection in your destination at a price that makes sense for your usage. You should evaluate providers based on a few key criteria: coverage, data packages, price, and customer support.
First and foremost is coverage. Where are you traveling? If your trip is to a single country, like Spain, a country-specific eSIM will often provide the best value and performance. However, if you're on a multi-country European tour, a regional eSIM (e.g., a 'Europe' plan) is far more convenient, as it will automatically switch between partner networks as you cross borders, saving you from buying a new plan in each country. For frequent flyers or those on a round-the-world trip, a global eSIM offers the ultimate flexibility, though it may come at a slightly higher price per gigabyte. Always check the provider's website to see which local networks they partner with in each country to ensure you'll have strong service.
Next, analyze the data packages available. Don't just look at the total data offered; consider the validity period. A 50GB plan that's only valid for 15 days is useless for a month-long trip. Conversely, a 5GB plan valid for 30 days might be perfect for a light user on a shorter trip. Try to estimate your daily usage. If you mainly use maps, email, and light browsing, 1GB per day is likely more than enough. If you plan on streaming video or using your phone as a hotspot, you'll need a much larger package. Also, check the provider's top-up policy. Can you easily add more data through their app if you run low, or do you have to purchase an entirely new plan?
Price is obviously a major factor. The best way to compare is by calculating the price per gigabyte (total cost divided by total GB). This helps you see the true value of different plans. For example, a 10GB plan for $20 ($2/GB) is a better deal than a 5GB plan for $15 ($3/GB). Be wary of 'unlimited' plans, as they often have fair usage policies that throttle your speed significantly after a certain threshold. Finally, consider the provider's reputation and customer support. Read reviews from other travelers on sites like Trustpilot. Do they have a responsive, 24/7 chat support system? A good support team can be invaluable if you encounter activation or connectivity issues abroad.
| Provider Type | Best For | Pros | Cons |
|---|---|---|---|
| Global Aggregators (e.g., Airalo) | Multi-country travelers, flexibility | Huge selection of countries/regions, competitive pricing, user-friendly apps. | Support can be less direct, performance depends on local partners. |
| Travel Specialists (e.g., Holafly) | Heavy data users, long trips | Often offer 'unlimited' data plans, focus on popular tourist destinations. | 'Unlimited' plans may have speed throttling, can be more expensive. |
| Direct from MNOs (e.g., Orange) | Single-country deep dives, need for a phone number | Excellent network performance, often include a local phone number for calls/texts. | Less flexible for multi-country trips, may have more complex signup. |
How Do You Activate an eSIM for Travel? A Step-by-Step Guide
Activating a travel eSIM is a straightforward process that you can complete in just a few minutes, ideally before you leave for your trip. While the exact menu names might vary slightly between iOS and Android, the core steps are universal: purchase, install, and activate. Following this guide will ensure you're ready to connect the moment you land.
Step 1: Purchase Your eSIM Plan
Before anything else, choose an eSIM provider and plan that fits your travel needs (coverage, data, and validity). Complete the purchase on their website or through their mobile app. Once the transaction is complete, you will receive an email containing a QR code and, in some cases, manual activation details. Keep this email handy; printing it or saving a screenshot on another device is a wise backup.
Step 2: Install the eSIM Profile on Your Phone (Do this before you travel)
This is the most critical step and should be done while you have a stable Wi-Fi connection at home. You are not activating the plan yet, just installing it so it's ready to use upon arrival.
For iPhone:
1. Go to Settings > Cellular.
2. Tap on Add eSIM or Add Cellular Plan.
3. Choose Use QR Code. Your camera will open.
4. Scan the QR code from your purchase email. If you can't scan it, you can select 'Enter Details Manually' and input the information provided.
5. Follow the on-screen prompts. Your phone will download and install the eSIM profile. You will be asked to label this new plan. Choose a clear name like "Europe Travel" or "Japan Data" to easily identify it later.
For Android (Samsung/Pixel):
1. Go to Settings > Network & Internet > SIMs.
2. Tap the + icon or "Add eSIM".
3. Select Download a SIM instead? or a similar option, then tap 'Next'.
4. The camera will open to scan the QR code. Point your phone at the code from your email.
5. Confirm the download and wait for the profile to be installed. As with iPhone, you'll be prompted to name the line.
Step 3: Configure Settings Before You Land
After installation, your phone will show two cellular lines. It's crucial to set them up correctly to avoid unwanted charges. Go back to your cellular settings. Assign a clear label to your new eSIM if you haven't already. For now, keep your primary (home) SIM as the line for voice and messages, and also for cellular data. Your new travel eSIM should be turned OFF until you arrive at your destination.
Step 4: Activate Upon Arrival
Once your plane has landed and you've disembarked:
1. Go back to your phone's cellular settings.
2. Turn OFF your primary (home) cellular line completely, or ensure its 'Data Roaming' is toggled off. This is the most important step to prevent your home carrier from charging you roaming fees.
3. Turn ON your new travel eSIM line.
4. Select the travel eSIM as the line to be used for Cellular Data.
5. Make sure 'Data Roaming' is turned ON for this new travel eSIM. This might seem counterintuitive, but it's necessary because the eSIM is technically 'roaming' on a local partner network. You will not be charged extra for this; it's included in the plan you purchased.
Within a minute or two, your phone should connect to the local network, and you'll see a network signal appear. You are now connected and can start using your data.
How Does eSIM Cost Compare to International Roaming and Local SIMs?
When evaluating connectivity options for travel, the cost is often the deciding factor. A travel eSIM typically occupies a highly competitive middle ground, offering significant savings over carrier roaming while being comparable to, and often more convenient than, buying a local physical SIM. The exact savings depend on the destination, trip duration, and data usage.
Let's start with the most expensive option: international roaming from your home carrier. Major carriers in the US, for example, often use a 'day pass' model. This might cost around $10 per day (e.g., AT&T International Day Pass, Verizon TravelPass) to use your domestic plan's data, talk, and text allowances abroad. While simple, the cost accumulates rapidly. For a 14-day trip to Europe, you would be looking at a bill of $140, plus taxes and fees. This cost is incurred even on days you use very little data. It's a convenient but extremely pricey solution for anything longer than a weekend trip.
Next, consider the traditional budget option: buying a local physical SIM card upon arrival. This is often the cheapest way to get a large amount of data. For that same 14-day trip in Italy, you might find a local SIM from a carrier like TIM or Vodafone for around €20-€30, offering 50GB or more of data. While the price per GB is excellent, this option has hidden 'costs' in the form of time and hassle. You have to locate a store, wait in line, present your passport for registration, and deal with a potential language barrier. You also temporarily lose access to your primary phone number, which can be an issue for receiving verification texts.
This is where the travel eSIM shines. For that same 14-day European trip, you could purchase a regional eSIM plan online before you leave. A typical plan might offer 10GB of data valid for 30 days for around $25-$35. While this might be slightly more expensive per gigabyte than the absolute cheapest local SIM, it completely eliminates the hassle. You land with instant connectivity and retain your primary number for calls and texts. The value proposition is the powerful blend of affordability and supreme convenience.
Here is a simplified cost comparison for a hypothetical 14-day trip to France:
| Option | Estimated Cost | Data Allowance | Pros | Cons |
|---|---|---|---|---|
| Home Carrier Roaming | $140 ($10/day) | Uses domestic plan | Seamless, uses your number | Extremely expensive |
| Local Physical SIM | $25 - $35 | ~50 GB | Cheapest per GB, has local number | Hassle to acquire, lose home number |
| Travel eSIM | $30 - $40 | ~20 GB | Convenient, instant connection, keep home number | Data-only, slightly higher cost per GB than local SIM |
As the table shows, the travel eSIM provides a near-perfect balance for the modern traveler. It delivers the vast majority of the cost savings of a local SIM without any of the logistical headaches, making the eSIM for travel the superior choice for most travel scenarios.
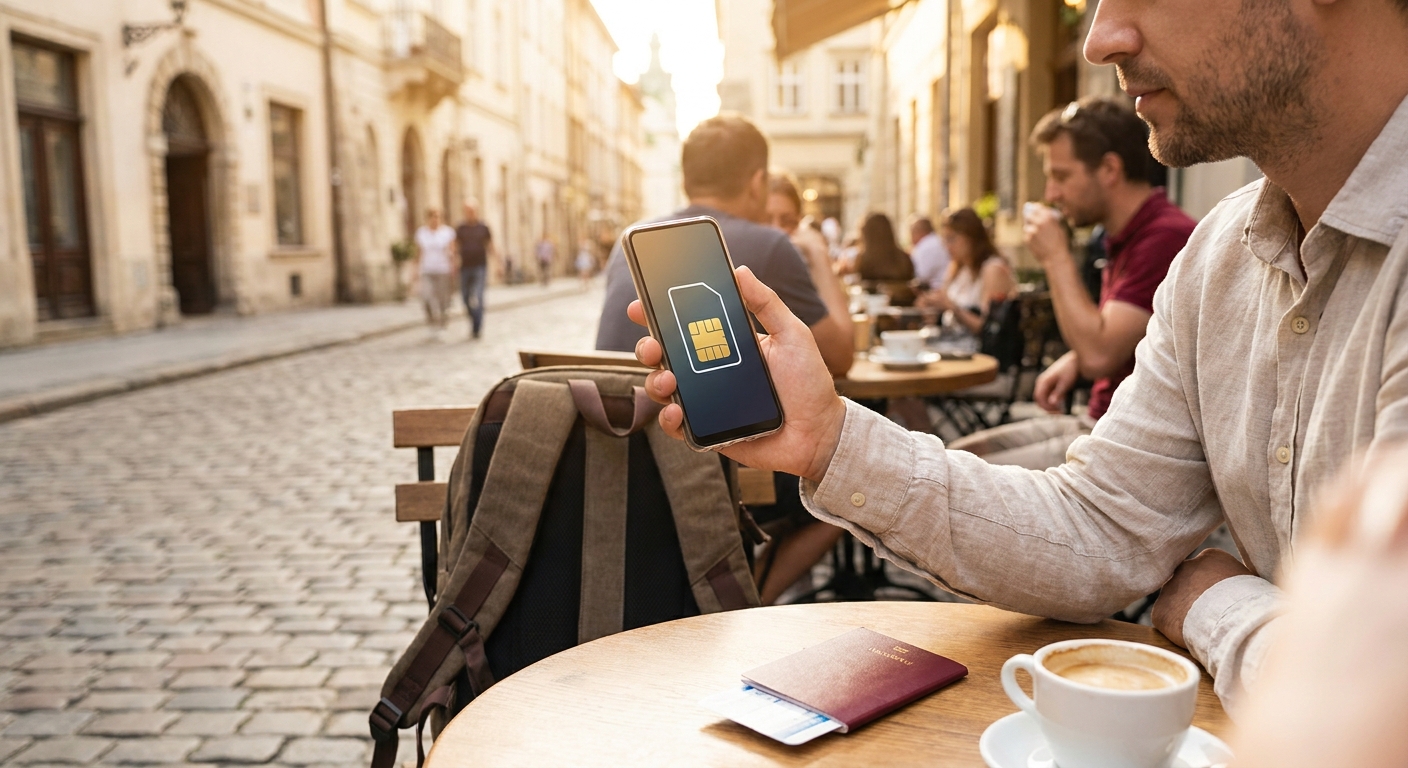
Can You Use Your Regular Phone Number While Using a Travel eSIM?
Yes, absolutely. One of the most powerful features of using an eSIM for travel is the ability to use affordable data abroad while keeping your primary phone number active for calls and texts. This is made possible by a technology called Dual SIM Dual Standby (DSDS), which is standard in virtually all modern eSIM-compatible phones.
DSDS technology allows your phone to have two cellular plans active simultaneously. Your phone can be connected to two different networks at the same time - one through your physical SIM and one through your eSIM. This means you can receive calls and SMS messages on your regular home number while using the travel eSIM's data plan for all your internet needs, such as using maps, browsing websites, or making calls over apps like WhatsApp or FaceTime Audio. This dual functionality offers immense flexibility and is a key reason travelers adopt eSIMs.
The setup is managed within your phone's cellular settings. You can designate specific roles for each line. The standard configuration for a traveler would be:
- Default Voice Line: Set to your primary (home) number. This ensures any outgoing calls you make use your regular number.
- Cellular Data: Set to your travel eSIM. This forces all internet traffic - from apps, browsing, and email - to go through the cheap, local data plan you purchased.
- iMessage & FaceTime (for iPhone users): You can choose which number to associate with these services, but it's often best to keep them linked to your primary number.
The most critical setting to manage is data roaming for your primary line. To avoid any charges from your home carrier, you must ensure that 'Data Roaming' is turned OFF for your primary SIM card. This prevents it from using any data abroad. However, it will remain connected to a local network for voice and text (a function sometimes called 'voice roaming'). While receiving SMS messages is usually free worldwide, making or receiving cellular calls on your primary number will still incur roaming charges from your home carrier. Many travelers get around this by using Wi-Fi Calling or by simply screening calls and only answering essential ones.
For example, a business traveler in London can use a UK data eSIM for emails and navigation. If their boss calls their US number, the phone will ring, and they can choose to answer it (and incur a roaming voice charge) or let it go to voicemail. They will still receive important two-factor authentication codes via SMS on their primary number without issue. This ability to intelligently separate data usage from primary line access is a revolutionary feature for anyone who needs to stay connected to home while traveling.
What Are Some Common Problems with Travel eSIMs and How Do You Fix Them?
While travel eSIMs are generally reliable, you might occasionally encounter issues with activation or connectivity. Most problems are minor and can be resolved with some basic troubleshooting. Understanding these common pitfalls and their solutions can save you a lot of stress when you're in a new country and need to get online.
Problem 1: The eSIM Won't Activate or Install
This often happens if you don't have a stable internet connection during the installation process. The QR code needs to connect to a server to download the profile.
Solution: Ensure you are connected to a strong, stable Wi-Fi network before you begin. If scanning the QR code fails multiple times, try the manual installation method. Most providers give you an SM-DP+ Address and Activation Code along with the QR code. In your phone's 'Add eSIM' menu, select 'Enter Details Manually' and type in this information. Also, double-check that your phone is indeed unlocked, as a locked device will reject the profile from another carrier.
Problem 2: The eSIM is Active, but There's No Internet Connection
This is the most common issue. You see the new network name at the top of your screen, but apps and browsers won't load.
Solution: There are three key things to check:
1. Data Roaming is ON: Go to the settings for your travel eSIM and make sure the 'Data Roaming' toggle is switched ON. It feels wrong, but it's necessary for the eSIM to work on a partner network.
2. Cellular Data is Assigned: In your main cellular settings, ensure you have selected the travel eSIM as the designated line for 'Cellular Data'.
3. APN Settings: Sometimes, the Access Point Name (APN) settings don't configure automatically. Your eSIM provider will include the correct APN details in their installation instructions. Go to your eSIM's settings, find the 'Cellular Data Network' or 'Access Point Names' section, and manually enter the provided APN (it's often a simple word like "internet" or "data"). Save the setting and restart your phone.
Problem 3: The Network Connection is Slow or Unstable
You're connected, but speeds are much lower than expected, or the connection keeps dropping.
Solution: First, try a simple restart of your device. This can force it to find a stronger signal or a better network tower. Second, try toggling Airplane Mode on for 30 seconds and then off again. This resets all network connections. If the problem persists, your eSIM provider may have partnerships with multiple local networks. Go into your eSIM's settings and look for 'Network Selection'. Turn off 'Automatic' and manually select one of the other available networks from the list to see if performance improves.
A final, crucial piece of advice is to prepare before you lose connectivity. Before your trip, take a screenshot of the manual activation details and the APN settings. Save the provider's customer support email address or WhatsApp number in your contacts. This way, if you run into an issue and can't get online to find the instructions, you'll have all the necessary information saved directly on your device.
The transition to eSIM technology represents one of the most significant advancements in personal telecommunications for the modern traveler. It untethers us from the constraints of physical SIM cards, replacing a system of plastic and logistics with one of software and immediacy. We've journeyed through the core of what an eSIM is - an embedded, rewritable chip - and explored how it functions by downloading digital carrier profiles over the air. This simple yet powerful mechanism is what unlocks a world of convenience, allowing us to land in a new country already connected, bypassing the queues and complexities of traditional solutions.
We've weighed the substantial benefits, from the immense cost savings over exorbitant roaming fees to the practical elegance of dual-SIM functionality, which lets us keep our home number active while using cheap local data. The ability to research and install a plan before a trip transforms a moment of potential stress at the airport into a seamless transition. However, we've also taken a balanced look at the current limitations, such as device compatibility, the nuances of digital-only support, and the need for careful setup to avoid common pitfalls. Understanding these challenges is key to harnessing the technology effectively.
Ultimately, the decision to use a travel eSIM comes down to valuing convenience, control, and cost-effectiveness. For the vast majority of travelers with compatible devices - from backpackers on multi-country treks to business professionals on short assignments - the eSIM is a clear winner. It provides a superior balance of features compared to both expensive home carrier roaming and the time-consuming process of hunting for a local SIM card. As device compatibility broadens and the technology becomes even more ubiquitous, the era of the physical SIM card for travel is undoubtedly drawing to a close. By embracing the eSIM, you are not just adopting a new technology; you are upgrading your entire travel experience with a modern eSIM for travel.
Frequently Asked Questions
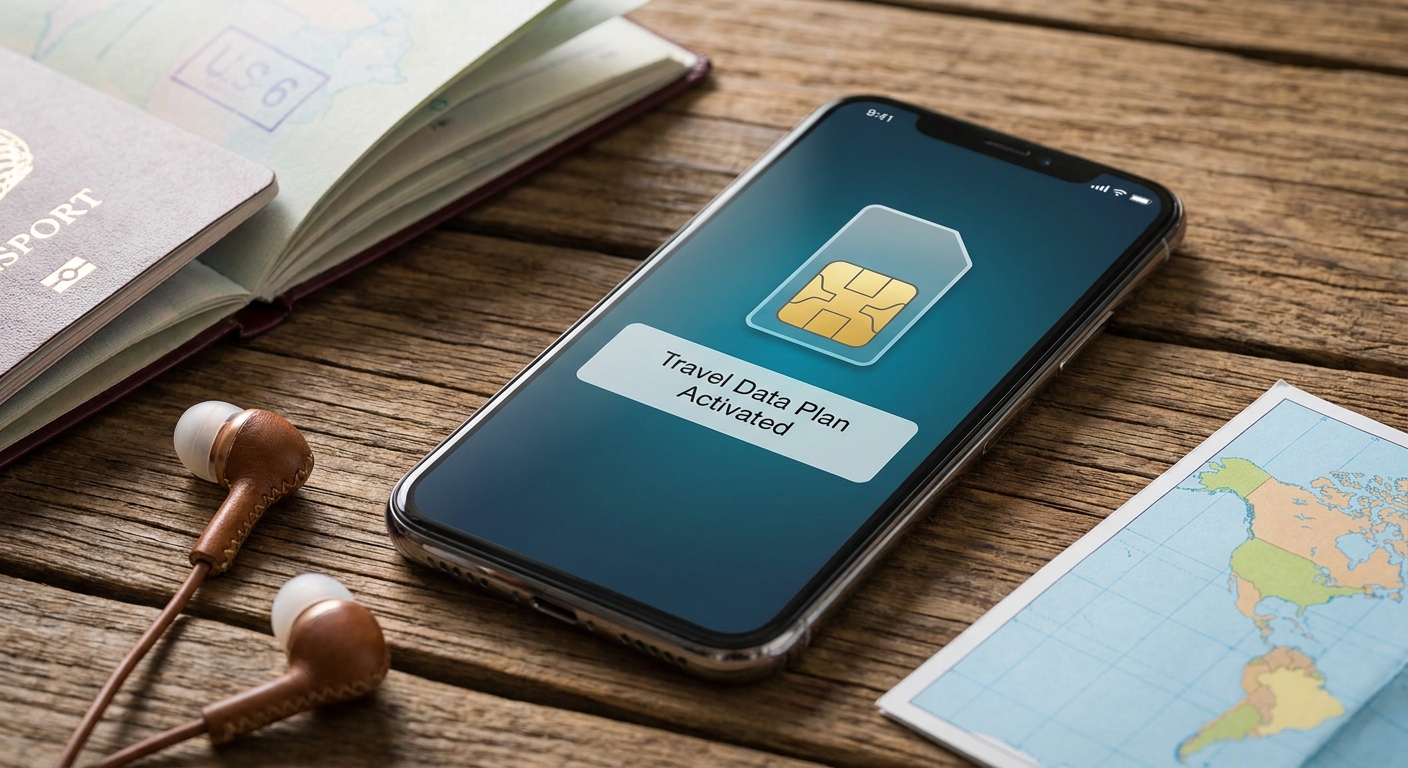
Yes, it is highly recommended that you install your travel eSIM before you leave home. The installation process requires a stable internet connection (like your home Wi-Fi) to download the carrier profile onto your phone. By setting it up in advance, your plan is ready and waiting on your device. Upon arrival at your destination, you simply need to go into your phone's settings, turn on the eSIM line, and enable data roaming for it. This ensures you have instant connectivity the moment you land, without needing to search for Wi-Fi.
Most travel eSIMs are data-only, meaning they do not come with a local phone number for making traditional cellular calls or sending SMS texts. Their primary purpose is to provide affordable mobile data. However, you can still make calls and send messages using data-based apps like WhatsApp, FaceTime, Telegram, or Skype. Some providers are beginning to offer premium eSIM plans that do include a local or regional phone number, but these are less common and typically cost more. Always check the plan details carefully if having a local number is important for your trip.
When your eSIM's data allowance is used up or its validity period expires, it will simply stop connecting to the internet. It does not automatically renew or incur any extra charges. Your eSIM profile will remain on your device, but it will be inactive. Most eSIM providers offer a way to top up your data or purchase a new plan through their app or website. You can easily add more data to your existing eSIM without needing to install a new one, making it convenient to extend your service if your travel plans change or you use more data than expected.
Yes, almost all eSIM-compatible phones are also Dual SIM Dual Standby (DSDS) capable. This allows you to have both your physical SIM and an eSIM active simultaneously. This is a major advantage for travelers. You can set your travel eSIM to be the primary source for all cellular data, taking advantage of cheap local rates. At the same time, your physical SIM with your home number remains active for receiving important calls and SMS texts (like bank verification codes). This gives you the best of both worlds: affordable data and connectivity to your primary number.
It is generally safe to buy eSIMs from reputable, well-known providers. Companies like Airalo, Holafly, Nomad, and others have established track records and secure payment systems. They partner with major mobile network operators worldwide to provide reliable service. However, as with any online purchase, it's wise to be cautious. Stick to providers with positive reviews on trusted platforms like Trustpilot or in travel blogs. Avoid obscure websites with unrealistic offers or poor-quality interfaces. A reputable provider will have a professional website, a clear privacy policy, and accessible customer support channels.